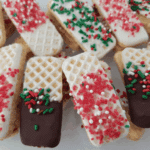
Why Chocolate-Dipped Sugar Wafers Delight Everyone

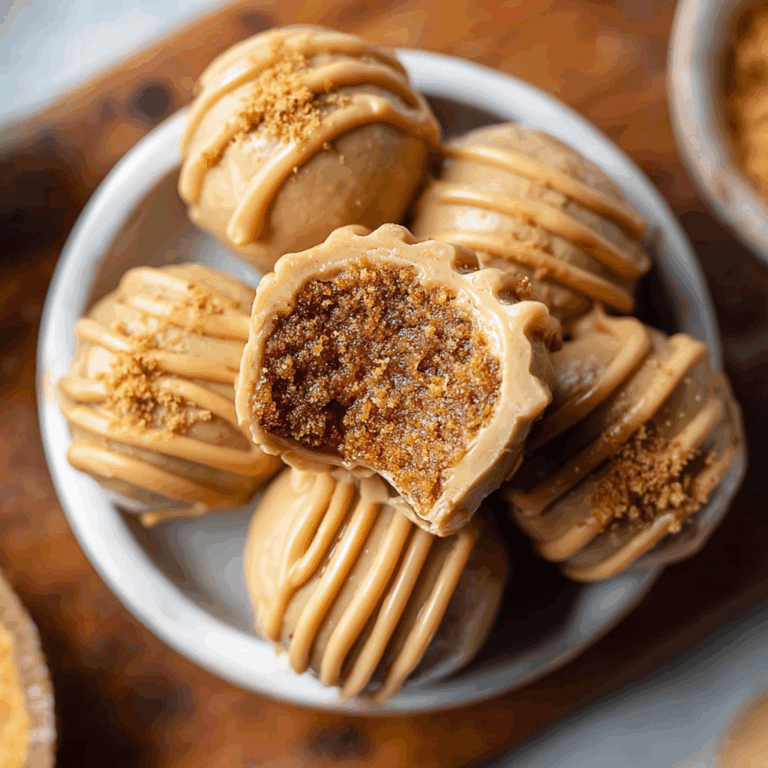
Chocolate-Dipped Sugar Wafers are a heavenly treat that combines the crisp, light crunch of delicate sugar wafers with the smooth, rich embrace of melted chocolate. Loved by dessert fans across the globe, this irresistible combination offers a perfect balance of texture and flavor, making it an unforgettable sweet snack. Whether enjoyed as an afternoon pick-me-up or an elegant party favor, Chocolate-Dipped Sugar Wafers never fail to delight taste buds and bring a smile to everyone’s face.
Why You’ll Love This Recipe
- Quick and Easy: You can whip up Chocolate-Dipped Sugar Wafers in minutes, perfect for last-minute cravings or party prep.
- irresistible Texture Contrast: The crunch of the sugar wafer paired with silky chocolate creates a mouthwatering experience you won’t forget.
- Customizable Flavor: Whether you prefer dark, milk, or white chocolate, this recipe adapts easily to your taste.
- Great for Gifting: Beautiful, homemade Chocolate-Dipped Sugar Wafers make thoughtful, delicious presents anyone would appreciate.
- Crowd-Pleaser: Simple but decadent, they appeal to kids and adults alike, making them perfect for any occasion.
Ingredients You’ll Need
The magic of Chocolate-Dipped Sugar Wafers lies in simple yet essential ingredients that blend to create a perfectly balanced sweet delight. Each ingredient plays its part in adding crunch, flavor, or smoothness to this treat.
- Sugar Wafers: Choose thin, crisp sugar wafers for that ideal crunchy base that melts in your mouth.
- High-Quality Chocolate: Select dark, milk, or white chocolate bars or chips for dipping; this is key to rich flavor and coating consistency.
- Coconut Oil or Butter (Optional): Adding a small amount makes the melted chocolate silky and easier to coat the wafers evenly.
- Sea Salt (Optional): A little sprinkle on top enhances the chocolate’s depth and balances sweetness beautifully.
- Decorative Toppings (Optional): Think finely chopped nuts, sprinkles, or shredded coconut to add a fun and tasty finish.
Variations for Chocolate-Dipped Sugar Wafers
Chocolate-Dipped Sugar Wafers are incredibly versatile and easy to adapt, allowing you to match your favorite flavors or dietary needs with just a few tweaks. Let your creativity run wild!
- Nutty Delight: Dip the wafers in chocolate and sprinkle chopped almonds, pecans, or hazelnuts on top for extra crunch and flavor.
- Spiced Chocolate: Mix in a pinch of cinnamon or chili powder into the melted chocolate for a warm, spicy twist.
- Vegan or Dairy-Free: Use dairy-free chocolate and coconut oil to make this recipe suitable for plant-based diets.
- Peanut Butter Drizzle: After dipping, add a drizzle of melted peanut butter for a classic and delicious combo.
- Double Chocolate: Coat the sugar wafers in dark chocolate, then drizzle white chocolate over the top for a beautiful contrast.

How to Make Chocolate-Dipped Sugar Wafers
Step 1: Prepare Your Ingredients
Gather your sugar wafers and choose your preferred chocolate. If adding coconut oil or butter, measure it out to mix with your chocolate for a smooth melt.
Step 2: Melt the Chocolate
Using a microwave-safe bowl or double boiler, melt your chocolate slowly, stirring frequently to avoid burning. Add coconut oil or butter to help achieve a glossy, even coating.
Step 3: Dip the Wafers
One by one, dip each sugar wafer into the melted chocolate, coating it completely or partially depending on your style. Allow excess chocolate to drip off before placing on parchment-lined trays.
Step 4: Add Toppings
While the chocolate is still wet, sprinkle optional sea salt or toppings of your choice to add flavor and visual appeal.
Step 5: Let Them Set
Place the chocolate-dipped wafers in the refrigerator or on the counter until the chocolate is fully hardened and set, usually around 15 to 30 minutes.
Pro Tips for Making Chocolate-Dipped Sugar Wafers
- Use Room Temperature Wafers: Prevent melting or sogginess by ensuring wafers aren’t cold before dipping.
- Temper Your Chocolate: For the best shine and snap, temper the chocolate properly before dipping.
- Thin Chocolate Layer: Avoid too thick a coating to keep the wafer’s crunch and prevent chocolate from overpowering.
- Work Quickly: Chocolate sets fast, so dip all wafers and add toppings without pausing.
- Store Properly: Keep your Chocolate-Dipped Sugar Wafers in an airtight container in a cool place for maximum freshness.
How to Serve Chocolate-Dipped Sugar Wafers
Garnishes
Elevate your presentation by adding a light dusting of powdered sugar, cocoa powder, or a sprinkle of edible gold flakes to your chocolate-dipped sugar wafers. These add a touch of elegance and make your treats stand out.
Side Dishes
Serve Chocolate-Dipped Sugar Wafers alongside hot beverages such as coffee, espresso, or tea for a delightful pairing that balances bitter and sweet flavors beautifully.
Creative Ways to Present
Arrange these delicious wafers in decorative boxes, on tiered platters, or wrapped individually in cellophane with ribbons for gifting or party favors. Presentation can turn simple wafers into a stunning dessert centerpiece.
Make Ahead and Storage
Storing Leftovers
Store chocolate-dipped sugar wafers in an airtight container at room temperature or in a cool, dry place for up to one week, preserving their crisp texture and fresh chocolate flavor.
Freezing
For longer storage, freeze wafers in a single layer within a sealed container or freezer bag. When ready to enjoy, thaw at room temperature to maintain their crunch and perfect texture.
Reheating
Chocolate-dipped sugar wafers are best enjoyed cold or at room temperature; reheating is generally not recommended as it can soften the wafers and dull the chocolate’s shine.
FAQs
Can I use different types of chocolate for this recipe?
Absolutely! Dark, milk, or white chocolate all work wonderfully to create Chocolate-Dipped Sugar Wafers, letting you tailor the flavor to your preference.
How do I prevent the chocolate from melting too quickly?
Store your finished wafers in a cool, dry place and avoid heat or direct sunlight to keep the chocolate coating firm and prevent melting.
Are Chocolate-Dipped Sugar Wafers suitable for kids?
Yes! These treats are kid-friendly and fun, but be mindful of potential allergies related to chocolate or toppings like nuts when serving to children.
Can I use homemade wafers instead of store-bought?
Definitely. Homemade sugar wafers add a personal touch, but ensure they are thin and crisp to maintain the ideal texture with the chocolate coating.
How long do Chocolate-Dipped Sugar Wafers last?
If stored properly in an airtight container, they stay fresh and crunchy for up to a week at room temperature, or longer when frozen.
Final Thoughts
Chocolate-Dipped Sugar Wafers are a simple yet incredibly satisfying treat that anyone can enjoy. Their irresistible crunch paired with luscious chocolate makes them a timeless sweet delight perfect for sharing with loved ones. So why wait? Grab your favorite chocolate and wafers today, and discover the joy of making this easy snack that always brings a little extra happiness to the day.
Related Posts
- Why Fried Strawberry Cheesecake Sandwiches Delight
- Creamy Chocolate Avocado Mousse to Try Today
- How to Make a Traditional King Cake Recipe
Chocolate-Dipped Sugar Wafers
Chocolate-Dipped Sugar Wafers combine the light, crisp crunch of thin sugar wafers with smooth, rich melted chocolate for an irresistible and elegant sweet treat. Quick and easy to prepare, these versatile wafers can be customized with your favorite chocolate type and toppings, making them perfect for gifting, parties, or a delightful snack any time of day.
- Prep Time: 10 minutes
- Cook Time: 10 minutes
- Total Time: 20 minutes
- Yield: 20 Chocolate-Dipped Sugar Wafers
- Category: Appetizers
- Method: No-Bake
- Cuisine: International
- Diet: Gluten Free
Ingredients
Main Ingredients
- Sugar Wafers – thin and crisp, about 20 pieces
- High-Quality Chocolate (dark, milk, or white) – 8 oz (225 g) bars or chips
Optional Ingredients
- Coconut Oil or Butter – 1 to 2 teaspoons to thin and smooth the chocolate
- Sea Salt – a pinch, for sprinkling on top
- Decorative Toppings such as finely chopped nuts, sprinkles, or shredded coconut – as desired
Instructions
- Prepare Your Ingredients: Gather thin, crisp sugar wafers and select your preferred type of chocolate. If using, measure out coconut oil or butter to mix with the chocolate for a smoother melt.
- Melt the Chocolate: In a microwave-safe bowl or double boiler, melt the chocolate slowly, stirring frequently to prevent burning. Add coconut oil or butter if desired to achieve a glossy, even coating.
- Dip the Wafers: Dip each sugar wafer individually into the melted chocolate, coating completely or partially according to your preference. Allow excess chocolate to drip off before placing wafers on a parchment-lined tray.
- Add Toppings: While the chocolate is still wet, sprinkle optional sea salt or your choice of decorative toppings like chopped nuts or sprinkles to enhance flavor and presentation.
- Let Them Set: Place the dipped wafers in the refrigerator or on the counter until the chocolate is fully hardened, about 15 to 30 minutes.
Notes
- Use room temperature wafers to prevent melting or sogginess during dipping.
- Temper the chocolate properly for best shine and crisp texture when set.
- Apply a thin layer of chocolate to maintain wafer crunch and prevent overpowering flavor.
- Work quickly as the chocolate sets fast when exposed to air.
- Store finished wafers in an airtight container in a cool place for freshness up to one week.
Nutrition
- Serving Size: 1 wafer
- Calories: 90
- Sugar: 7g
- Sodium: 10mg
- Fat: 6g
- Saturated Fat: 3.5g
- Unsaturated Fat: 2.5g
- Trans Fat: 0g
- Carbohydrates: 9g
- Fiber: 1g
- Protein: 1g
- Cholesterol: 2mg
Keywords: Chocolate-Dipped Sugar Wafers, Sugar Wafers, Easy Dessert, Quick Snack, Homemade Sweets, Party Treats, Gluten Free, Chocolate Snack