How to Make Homemade Vanilla Ice Cream Easy
If you’ve ever dreamed of crafting your own creamy, dreamy dessert, you’re in the perfect place! This guide to making Homemade Vanilla Ice Cream will walk you through how to create rich, smooth ice cream using simple, everyday ingredients without needing any fancy gadgets. From the classic buttery vanilla flavor to tips for achieving the perfect texture, you’ll learn everything to impress your friends and family with your homemade treat.
Why You’ll Love This Recipe
- Simple Ingredients: Uses basic pantry staples like milk, cream, sugar, and vanilla—no complicated or hard-to-find items needed.
- No Special Equipment: You don’t need an ice cream maker; the recipe is designed to be easy and accessible for every home cook.
- Customizable Flavor: The classic vanilla base is easy to personalize with mix-ins or variations to suit your taste.
- Perfect Texture: Achieves a creamy, smooth texture that rivals store-bought ice cream.
- Fun and Rewarding: Making ice cream at home is enjoyable and a great way to impress guests or enjoy a cozy night in.
Ingredients You’ll Need
You’ll love how few, yet essential, ingredients go into this recipe. Each ingredient plays a crucial role in flavor, creaminess, and the beautiful vanilla color of your ice cream.
- Heavy Cream: Provides richness and the creamy mouthfeel that’s essential for good ice cream.
- Whole Milk: Balances out creaminess with just the right amount of dairy lightness.
- Granulated Sugar: Sweetens and helps create a smooth texture by lowering the freezing point.
- Pure Vanilla Extract: Gives the signature sweet, floral vanilla aroma and flavor that make this recipe special.
- Salt: Just a pinch enhances the sweetness and rounds out the flavors perfectly.
Variations for Homemade Vanilla Ice Cream
One of the joys of making Homemade Vanilla Ice Cream is how easily you can tweak the recipe. Whether you want to experiment with new flavors or accommodate dietary needs, the base is versatile and forgiving.
- Rich Bourbon Infusion: Add a splash of bourbon for a sophisticated twist with depth and warmth.
- Dairy-Free Alternative: Swap heavy cream and milk for coconut milk and coconut cream for a creamy, dairy-free version.
- Vanilla Bean Upgrade: Use fresh vanilla bean seeds instead of extract for a more intense vanilla flavor and speckled appearance.
- Chocolate Chip Mix-In: Stir in mini chocolate chips during the last stage of freezing for a classic combo.
- Berry Swirl: Fold in fresh or thawed frozen berries for a fruity surprise.

How to Make Homemade Vanilla Ice Cream
Step 1: Prepare the Base
In a mixing bowl, combine the heavy cream, whole milk, sugar, and salt. Whisk everything together until the sugar has completely dissolved and the mixture feels smooth. Then, stir in the vanilla extract to give that rich, comforting vanilla aroma.
Step 2: Chill the Mixture
Cover the bowl with plastic wrap and pop it into the refrigerator to chill for at least two hours or overnight. This cold base is crucial to develop the right texture and flavor intensity before freezing.
Step 3: Freeze and Stir
Pour the chilled mixture into a shallow, freezer-safe container. Stir vigorously every 30 minutes for about 2 to 3 hours as it freezes to break up ice crystals and ensure creamy consistency without ice cream maker equipment.
Step 4: Final Freeze
Once the consistency is thick and creamy, cover the container tightly and freeze for an additional 2 to 4 hours until fully set. Your homemade vanilla ice cream is now ready to scoop and enjoy!
Pro Tips for Making Homemade Vanilla Ice Cream
- Use Full-Fat Dairy: Heavy cream and whole milk create smoother and richer ice cream than lower-fat options.
- Chill Ingredients First: Starting with cold ingredients helps reduce freezing time and improves texture.
- Be Patient When Stirring: Stir every 30 minutes to avoid ice crystals and get perfect creaminess without a machine.
- Choose Quality Vanilla: Good quality vanilla extract or beans make a huge difference in overall flavor depth.
- Don’t Skip Salting: A tiny pinch of salt balances flavor and enhances the sweetness.
How to Serve Homemade Vanilla Ice Cream
Garnishes
Sprinkle freshly grated nutmeg, drizzle warm caramel sauce, or add a few fresh berries on top to elevate your ice cream experience. Even a simple dusting of cocoa powder can add a twist.
Side Dishes
Pair your homemade vanilla ice cream with brownies, warm apple pie, or freshly baked cookies. These comfort food companions create indulgent dessert moments every time.
Creative Ways to Present
Serve your ice cream in hollowed-out waffle cones or beautifully carved fruit bowls. For a fun twist, layer scoops with fruit compote or crushed nuts in parfait glasses for a dazzling dessert presentation.
Make Ahead and Storage
Storing Leftovers
Store your leftover ice cream in an airtight container to prevent freezer burn and preserve freshness. Press a piece of parchment paper directly on the surface before sealing to minimize ice crystals.
Freezing
Freeze homemade vanilla ice cream for up to two weeks for the best flavor and texture. Longer freezing times may cause slight graininess, so enjoy it sooner rather than later.
Reheating
Unlike soups or meats, ice cream doesn’t need reheating. Instead, let it sit at room temperature for 5 to 10 minutes before scooping to soften slightly, making it easier to serve without losing its delicious texture.
FAQs
Can I make homemade vanilla ice cream without an ice cream maker?
Absolutely! This recipe is designed to be made without an ice cream maker by stirring the mixture every 30 minutes while freezing to prevent icy texture and promote creaminess.
What kind of vanilla is best for homemade vanilla ice cream?
Pure vanilla extract works perfectly, but for an extra rich flavor, using the seeds from a fresh vanilla bean can really elevate the taste and give your ice cream lovely vanilla flecks.
How long does homemade vanilla ice cream last in the freezer?
For the best taste and texture, homemade vanilla ice cream keeps well for up to two weeks when stored properly in an airtight container.
Can I make this recipe dairy-free or vegan?
Yes! Substitute the heavy cream and milk with coconut milk or another plant-based milk and cream alternative to make a dairy-free or vegan-friendly version that still tastes great.
How can I prevent ice crystals from forming?
Regularly stirring the ice cream mixture during the freezing process and using high-fat dairy ingredients help minimize ice crystal formation and create a smooth, creamy texture.
Final Thoughts
Making Homemade Vanilla Ice Cream is not only fun and satisfying but also gives you a timeless, delicious treat anytime you crave something sweet and creamy. With simple ingredients and easy steps, you can whip up a batch that will quickly become a family favorite. So grab your mixing bowl and start creating your own perfect scoop today!
Related Posts
- Why Strawberry Jello Poke Cake Is a Must-Try Dessert
- Why Italian Affogato Is the Perfect Dessert
- Easy Chocolate Strawberry Yogurt Clusters Recipe
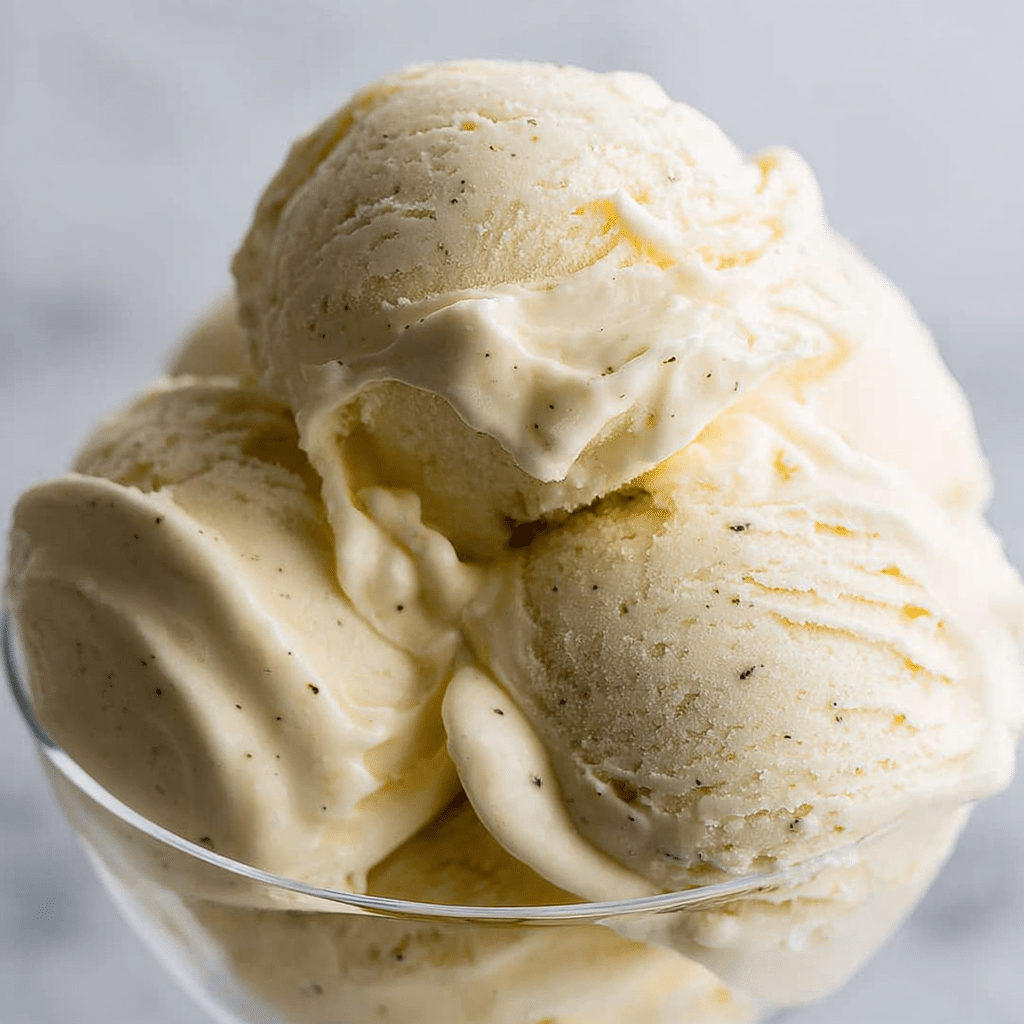
Homemade Vanilla Ice Cream

This Homemade Vanilla Ice Cream recipe teaches you how to create a rich, creamy, and smooth ice cream using simple ingredients like heavy cream, whole milk, sugar, and pure vanilla extract. No ice cream maker is needed—just patience and stirring as it freezes. Perfectly customizable, this classic vanilla ice cream can be enhanced with various mix-ins or dietary substitutions. Enjoy a delightful, refreshing dessert that rivals store-bought versions with an irresistible homemade touch.
- Prep Time: 10 minutes
- Cook Time: 3 to 4 hours (includes stirring and final freezing)
- Total Time: 5 to 6 hours (including chilling overnight if preferred)
- Yield: Approximately 4 cups (8 servings) 1x
- Category: Dessert
- Method: Freezer stirring method
- Cuisine: American
- Diet: Gluten Free
Ingredients
Main Ingredients
- 2 cups heavy cream
- 1 cup whole milk
- 3/4 cup granulated sugar
- 1 teaspoon pure vanilla extract
- Pinch of salt
Instructions
- Prepare the Base: In a mixing bowl, combine the heavy cream, whole milk, sugar, and salt. Whisk together until the sugar has completely dissolved and the mixture feels smooth. Stir in the vanilla extract to add the rich vanilla aroma and flavor.
- Chill the Mixture: Cover the bowl with plastic wrap and refrigerate for at least two hours or overnight. This step is crucial to develop the right texture and flavor intensity before freezing.
- Freeze and Stir: Pour the chilled mixture into a shallow, freezer-safe container. Stir vigorously every 30 minutes for 2 to 3 hours to break up ice crystals and achieve a creamy consistency without an ice cream maker.
- Final Freeze: Once the ice cream has thickened and become creamy, cover the container tightly and freeze for an additional 2 to 4 hours until fully set. Your homemade vanilla ice cream is now ready to enjoy.
Notes
- Use full-fat dairy like heavy cream and whole milk for a richer, smoother ice cream.
- Ensure all ingredients are chilled before starting to reduce freezing time and improve texture.
- Stirring every 30 minutes during freezing prevents ice crystals and enhances creaminess.
- Choose high-quality vanilla extract or fresh vanilla bean seeds for the best flavor.
- A pinch of salt balances and enhances the sweetness.
- Store leftovers in an airtight container with parchment paper on top to minimize ice crystals.
- Consume within two weeks for optimal freshness and texture.
- Allow ice cream to sit at room temperature for 5 to 10 minutes before scooping for easier serving.
Nutrition
- Serving Size: 1/2 cup
- Calories: 210
- Sugar: 18g
- Sodium: 40mg
- Fat: 14g
- Saturated Fat: 9g
- Unsaturated Fat: 4g
- Trans Fat: 0g
- Carbohydrates: 20g
- Fiber: 0g
- Protein: 2g
- Cholesterol: 55mg
Keywords: vanilla ice cream, homemade ice cream, no ice cream maker, creamy dessert, classic vanilla, easy dessert